Newall Measuring Machines:
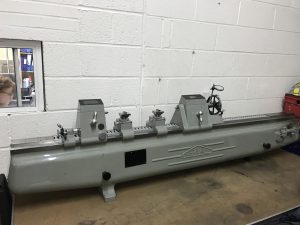
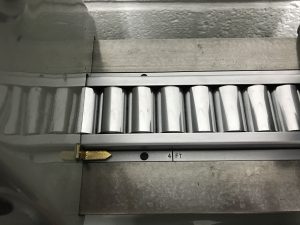
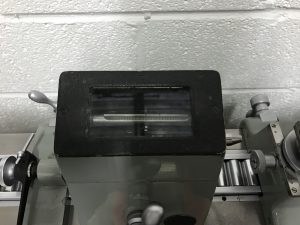
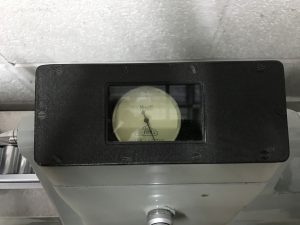
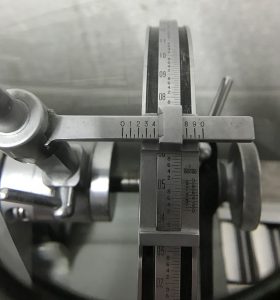
Some very accurate linear measuring machines were marketed under the Newall name but they were actually manufactured by OMT. They were designed primarily for the periodic checking of gauges and tooling devices to detect any changes that might have taken place due to their regular use. Four different models were listed in the 1963 catalogue having capacities of 24″ (600mm), 48″ (1200mm), 72″ (1800mm) and an impressive 144″ (3600mm). It employed the famous Newall roller measuring system whereby a series of accurate one-inch diameter rollers, butted up to one another, guaranteed that the headstock and tailstock were a precise number of inches apart. This system had proved itself on the range of Newall jig borers, which employed the same arrangement of rollers in contact with each other. A very large micrometer handwheel on the headstock could then be used to sub-divide the final inch of measurement, allowing direct reading to one hundred-thousandth part of an inch (or on metric models to one ten-thousandth part of a millimetre). The NPL (National Physical Laboratory) specification of accuracy for these machines makes interesting reading and can be downloaded here.
Neil Anderson of Instrument Repairs and Calibration Ltd has sent in these photos of a machine in superb condition that his company regularly used until recently for calibrating length standards and internal micrometers. (Click on the images to enlarge).
Neil tells us he bought this machine from Avon-Dynamic in Bristol, another calibration services company. He recently removed the black rectangular plate that you can see in the general view of the machine and found that it had been reversed. It stated that the machine had been on loan from The Electric Construction Company Ltd (ECC), Bushbury Engineering Works, Wolverhampton, who may have been the original owners. That company had been established in 1889 and became well known in the heavy electrical engineering field. Clearly, their reputation depended upon the accuracy of their machining operations, and OMT were ultimately responsible for ensuring that these high standards were maintained. ECC were later absorbed into the Hawker-Siddely group and were eventually closed down in 1985 (source: Grace’s Guide). More information about ECC available to view at www.historywebsite.co.uk/Museum/Engineering/Electrical/ECC.htm.
Large Instrument:
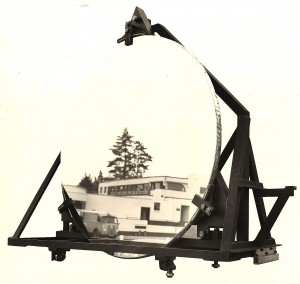
It is worth drawing particular attention to the largest of the OMT product range, the WP100 large capacity universal projector. The brochure can be downloaded here (2MB). This was a huge machine, almost as big as a small bedroom and weighing in at almost four and a half tonnes. It was designed for the inspection of contours such as templates, gears, cam forms, broached parts and screw threads etc. The design of the optics for this machine included a circular projection mirror 1168mm in diameter, mounted vertically at the rear of the device. This was one of the largest mirrors in production at that time.
Take a look at the building reflected in that huge mirror. It was an Art-Deco building across the other side of Oldfield Road. The building (with some modifications and additions) still existed when the author went visiting in September 2016 as you can see here:
Sadly, it was demolished in 2019, with plans to replace it with 37 flats. An article in the Maidenhead Advertiser dated 14th June 2018 explained that the building, known as Exclusive House, popularly referred to as the Showboat, was a club in the 1930’s and was famed for the swimming and cabaret it used to offer. The building, described by the Advertiser in 1933 as the ‘Palm Beach of Maidenhead’, was being used as an Officers’ Club by American servicemen by 1942, and then as a factory to make Spitfire wings.
Rumour has it that some rather attractive young ladies worked in that building back in the 1950’s, and they would probably have been surprised to learn that they were closely observed by some of the staff over the road in the OMT factory. We understand these young ladies made ideal targets for testing the zoom function of the Newall movie cameras (see Newall Engineering Products Page 1) after final assembly!
Special Jobs:
Two rather special jobs have been unearthed during our research, illustrating both the wide variety of work handled by OMT, and their obvious reputation. As it happens, reference to the first of them was made in the film “Just a Second” (see next item). The second example was mentioned in a newspaper article although, for reasons that will become clear, no detail was provided:
- A special non-magnetic rotary table was manufactured for The Admiralty Compass Observatory for checking compasses and gyroscopes. A superstructure erected over the rotary table was designed to simulate any magnetic field likely or unlikely to be encountered anywhere in the world. Like the table it was, of course, non-magnetic. Some quite unforeseen difficulties were encountered with this table; even some bronzes and aluminium alloys were found to be slightly magnetic and believe it or not, even the paint was eventually checked. The rollers, which are normally of hardened steel, were made of fused silica.
- There is no doubt that OMT fulfilled a number of special orders in connection with Britain’s civil and military nuclear programmes. In the nuclear power industry, special optical inspection techniques were developed for checking the integrity of the complex spiral-finned tubes that would eventually contain the Magnox fuel in a nuclear reactor. On the military side, it has been reported (Reading Mercury 4th August 1968) that OMT made regular deliveries of special equipment to the Atomic Weapons Establishment at Aldermaston. It has been difficult (actually, impossible) to find out the precise nature of this equipment because very few people were authorised to know the full details of it (and no doubt they would have been bound to life-long secrecy by the Official Secrets Act). However, we believe that one piece of equipment was concerned with the precise measurement of the thickness of the shell of a hollow sphere and was presumably connected with the development of Britain’s weapons. There has been a suggestion that this equipment might have been remotely controlled to allow it to be used in a radioactive environment. If that is so, then this would have been a significant feat of control engineering for the day. Unfortunately, we are unlikely ever to know for certain if this suggestion is accurate.
“Just a Second”:
A promotional film was made as a sales aid called “Just a Second”. We are aware of one copy of this film (dubbed in Russian) having found its way to Rotary Precision Instruments UK Ltd. Sadly, it seems the film itself has been destroyed but we do have an English transcript (thank you, Stan). The viewer had to imagine they were on an aircraft flying from London to New York and that they could look down and see various factories and other things (including the new QE2 liner) along the way. We understand an OMT Sales Specialist (Ernest Astbury) was the host, sitting in a wooden mock-up of an aircraft cabin for the duration of the film, with a vacuum cleaner motor making suitably authentic aircraft noises!
One of the aims of the film was to impress upon the potential customer the accuracy to which OMT rotary tables were manufactured (typically one arc-second) and to illustrate just what that level of accuracy meant by way of real-life analogies. Three examples were provided:
- “Imagine a target set at a distance of 3.25 miles. If it were possible for a bullet to travel that far and hit the target within 25mm of the bull, then the rifle need only be moved by one second of arc to hit dead-centre.”
- “We’re flying something like 3000 miles from London to New York. If we were flying to an accuracy of 1 second of arc, our error on arrival at our destination would be about the wingspan of this plane!”
- One second of arc is equivalent to 0.000025 inch (a quarter-tenth of a thou’) at a radius of 5 inches. For purposes of comparison, a “quarter-tenth” is to one inch as one inch is to the liners Queen Mary, France and America in line astern with some 200 feet of space between each vessel. Alternatively, a quarter-tenth is one hundredth of the diameter of a human hair.
OMT-ETAMIC Process Gauging Equipment:
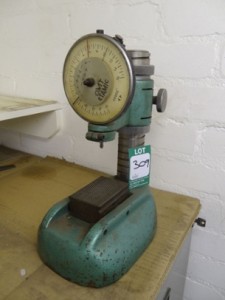
During the 1960’s OMT were agents for Etamic air gauging equipment manufactured by Ateliers de Normandie in France. An example of one of the early Etamic indicator units is shown. The later Etamic product range appears to have included electronic gauging systems using LVDT (linear variable differential transformer) transducers, although it is unclear whether OMT were involved with these.
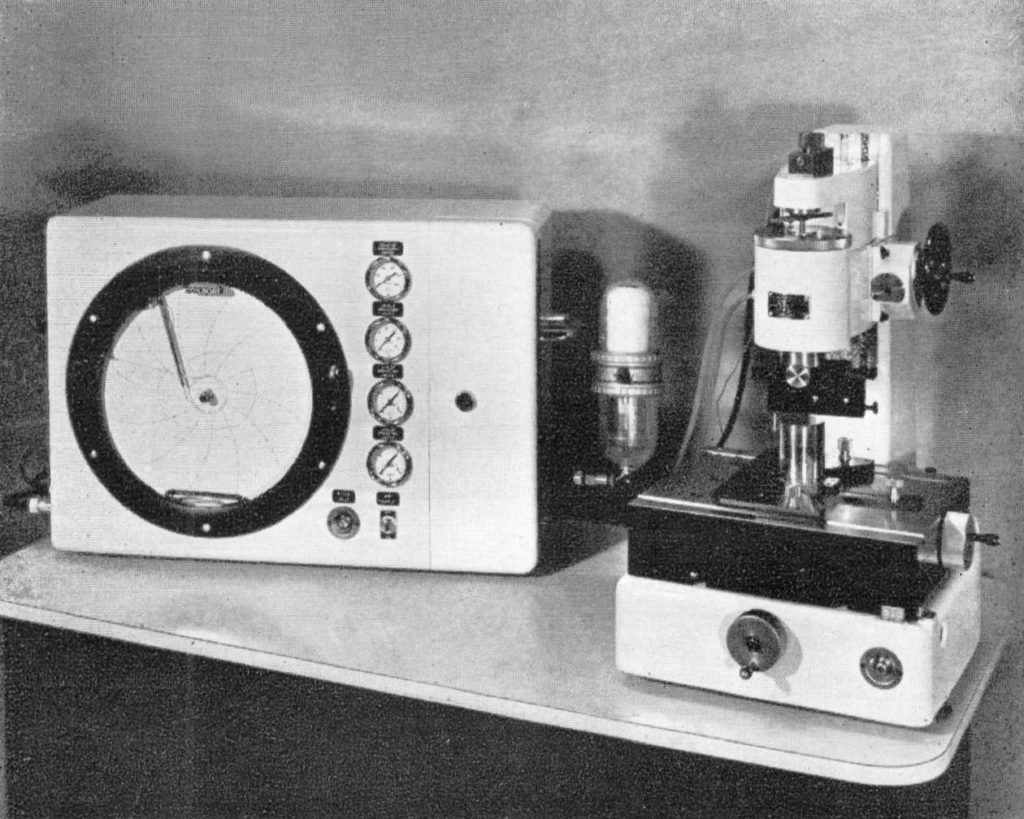
Bob Peacock sent us this photo of a Roundness Measuring Machine and chart recorder. This was part of the Etamic range of equipment, featuring air gauging and an air bearing head.
A development of the Etamic range seems to have resulted in “System E” (see brochure here) handled by a new division of Newall Group Sales called QCS (Quality Control Systems) with its headquarters in Leamington Spa, Warwickshire, and an agent (Kelco Automation North America Inc.) in Troy, Michigan. Information on this division is proving difficult to obtain at present, but we have seen the minutes of a meeting held on 24th July 1970 between OMT and QCS. It confirmed that many standard Etamic parts would be dropped from the range and that OMT would design and manufacture automation heads and a standard range of orifices. It went on to say that replacement parts and service should be maintained for 12 months from 1st July 1970, so this appears to signal the end of the Etamic partnership.

